Import Files into a VRE
- Create New Import Job Request
- Select files to Upload
- Confirm files and submit job
- See Import Job in Dashboard Screen
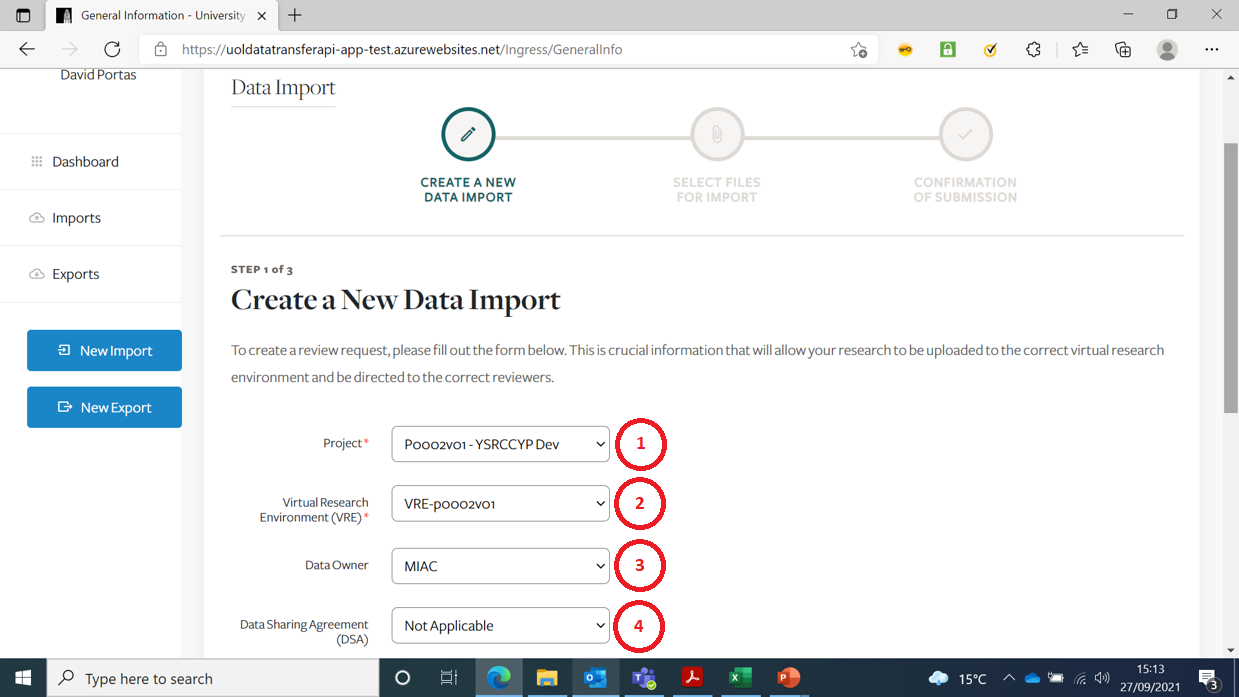
Create New Import Job Request
This is the Create New Import page.
You have to select an item from the drop-downs when prompted.
| Item | Description |
|---|---|
| 1 | You should only be presented with Projects you are associated with |
| 2 | You should only be presented with VRE’s associated with the Project you selected |
| 3 | If Data Owner is not known, select ‘N/A’ |
| 4 | Data Sharing Agreement can be ‘N/A’ (if Data Owner is ‘N/A’ |

| Item | Description |
|---|---|
| 5 | There are only 3 possible Transfer Methods |
| 6 | Version 1 of the App will default to All Reviewers |
| 7 | Enter a meaningful short title for the Job |
| 8 | Enter a meaningful description for the Job |
| 9 | Either Proceed or Cancel (to go back to previous page) |
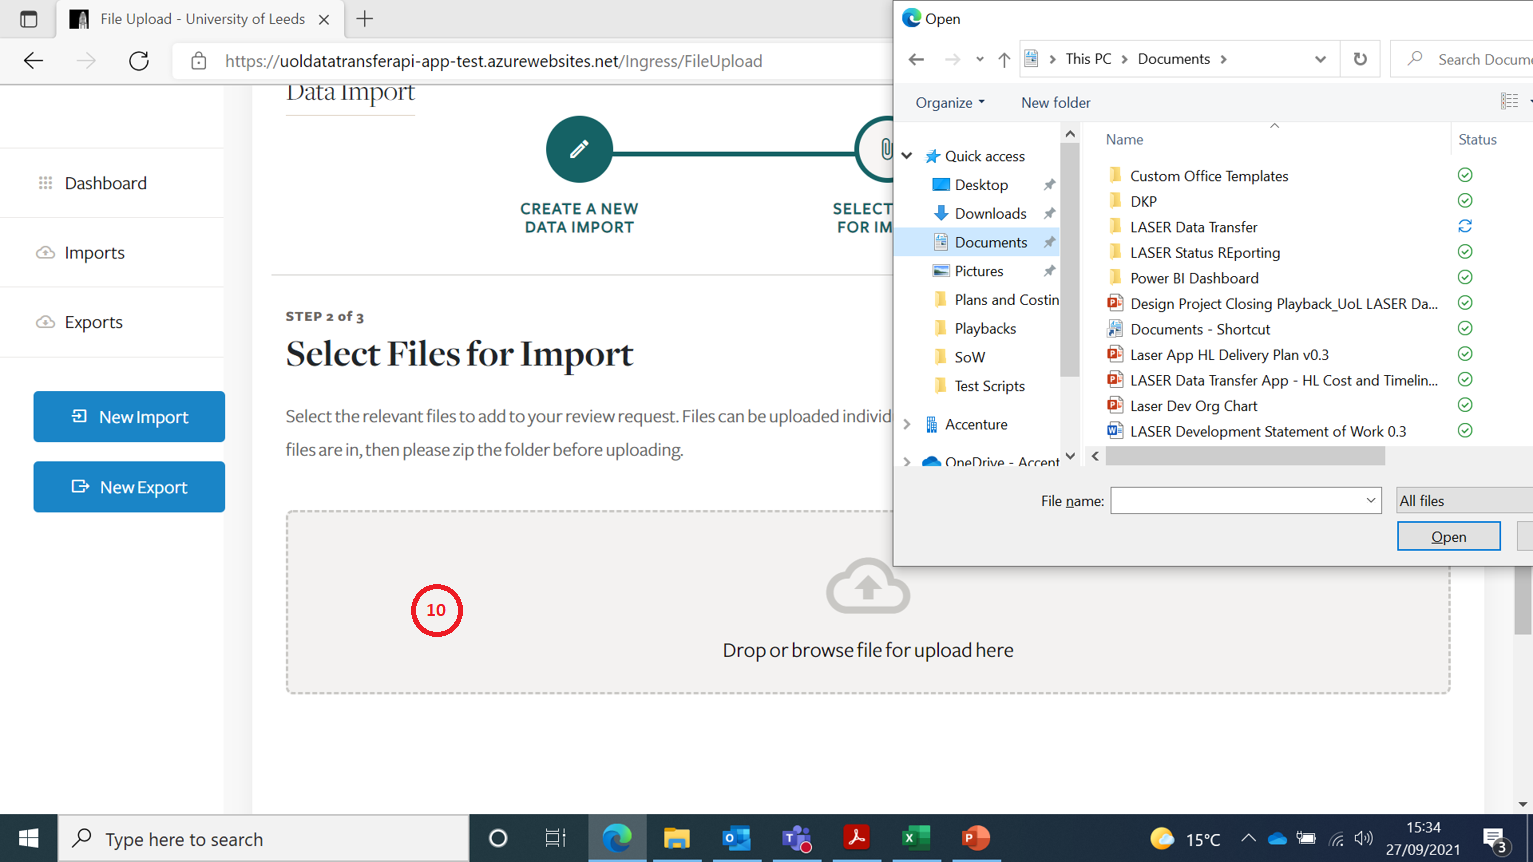
Select files to Upload
Any files types can be uploaded except empty files.
Folders cannot be uploaded.
There is no max file/job size limit - the system has been tested to upload 30GB.
| Item | Description |
|---|---|
| 10 | Click here to open a file selector or drag & drop files |
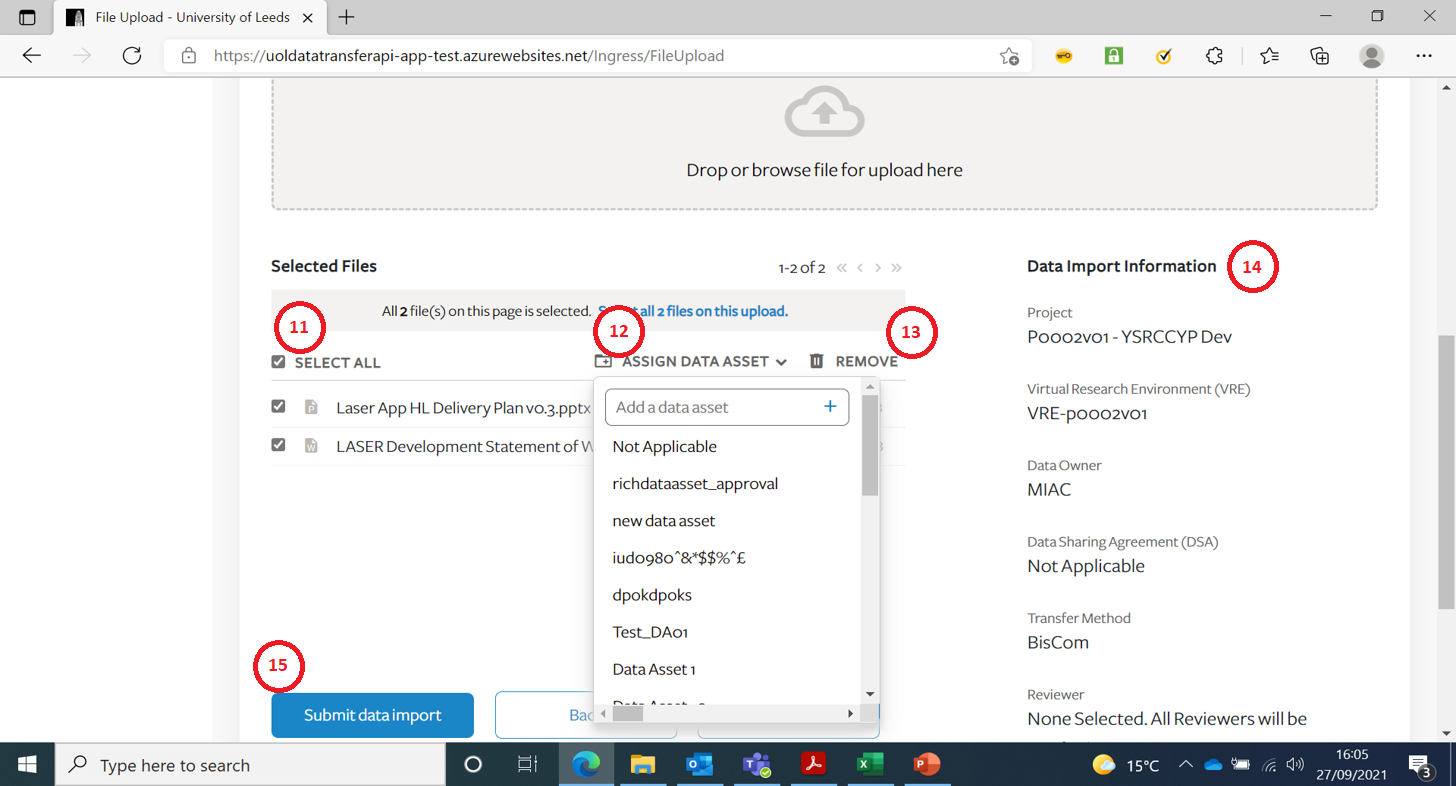
Confirm files and submit job
| Item | Description |
|---|---|
| 11 | You can select one or more files for further action |
| 12 | You can change or add a new Data Asset |
| 13 | This allows you to remove files uploaded in error |
| 14 | This pane summarises details of the Job |
| 15 | Press ‘Submit’ once you are happy with your selections(You will receive one more confirmation prompt after this) |
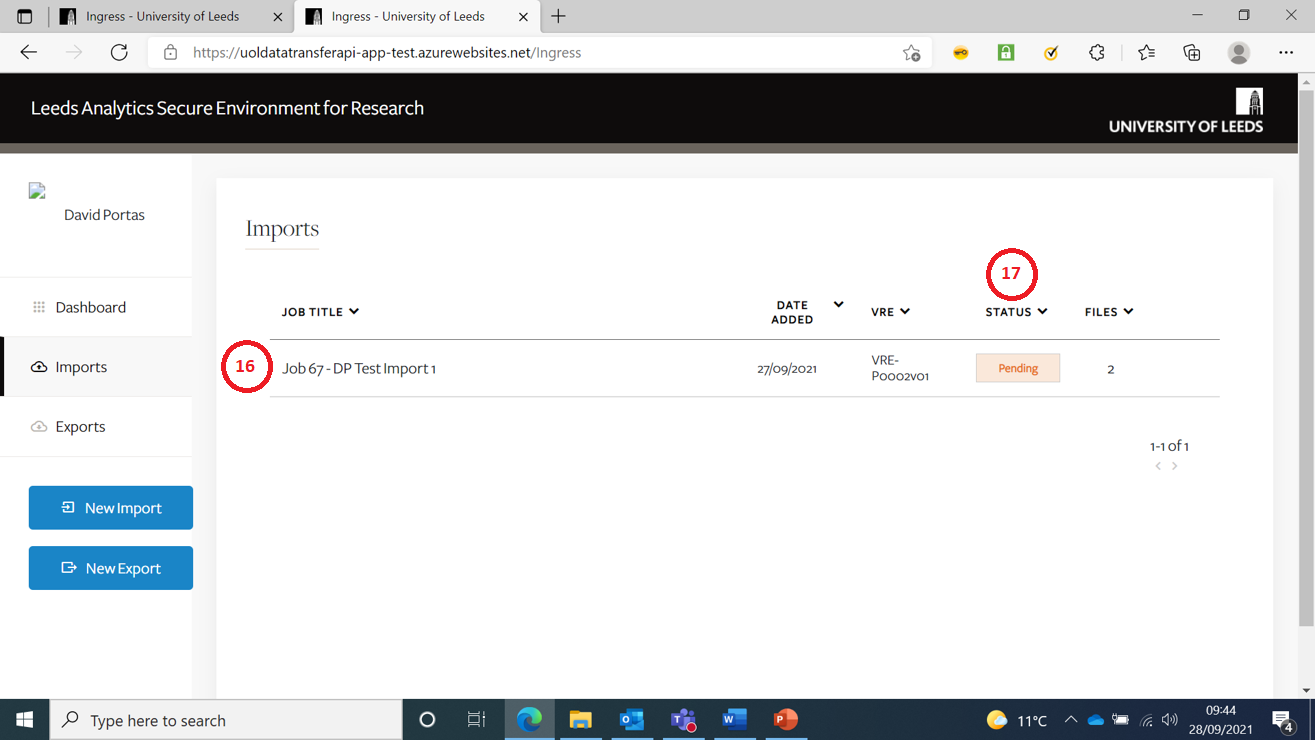
See Import Job in Dashboard Screen
If you go back to the Dashboard screen your Import Job(s) should be listed.
| Item | Description |
|---|---|
| 16 | Your Import Jobs should be listed in order of Date Added (Created) |
| 17 | The Status column lets you know if your Job is ‘Pending’ review, or has been reviewed and been ‘Approved’ or ‘Rejected’ |