Export Files from a VRE
Create New Export Job Request
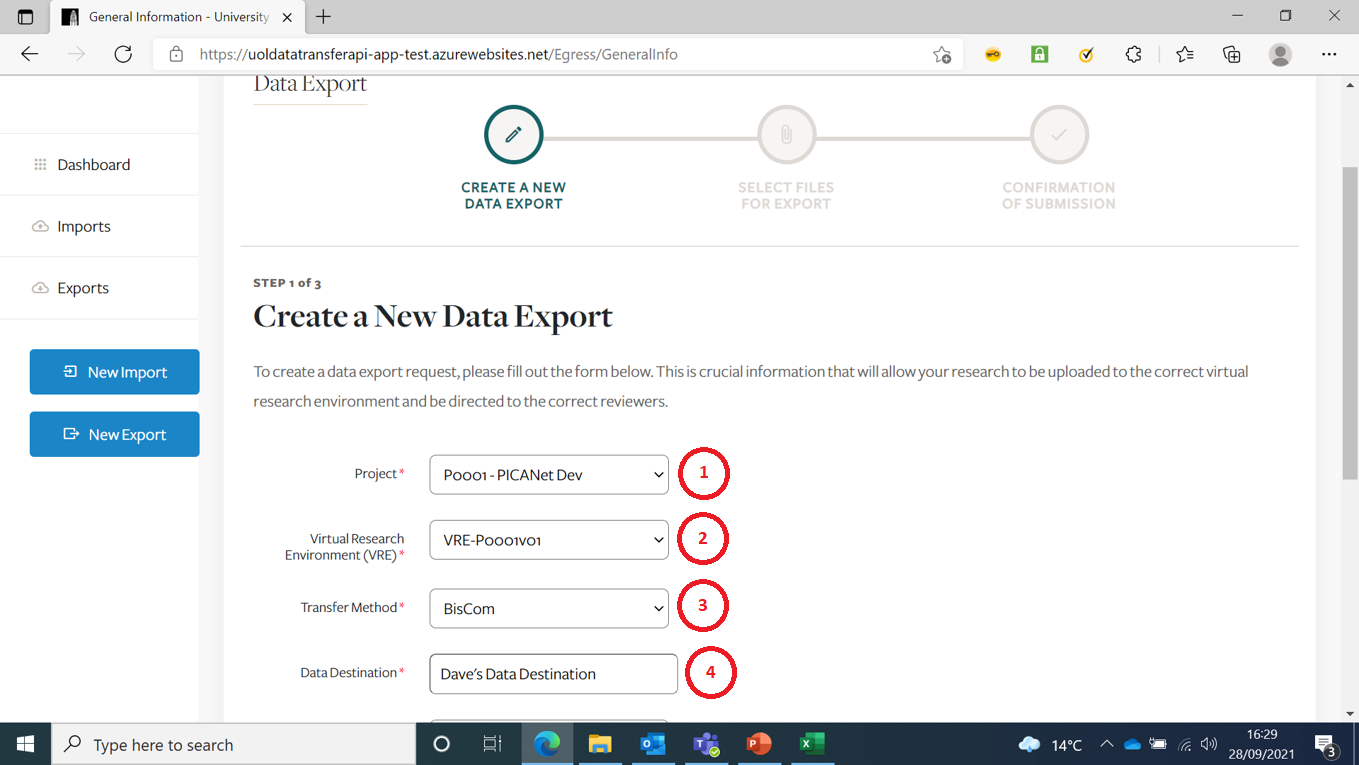
This is the Create New Export page.
You have to select an item from the drop-downs when prompted.

| Item | Description |
|---|---|
| 1 | You should only be presented with Projects you are associated with |
| 2 | You should only be presented with VRE’s associated with the Project you selected |
| 3 | There are only 3 possible Transfer Methods |
| 4 | Data Destination is a free-form text box |

| Item | Description |
|---|---|
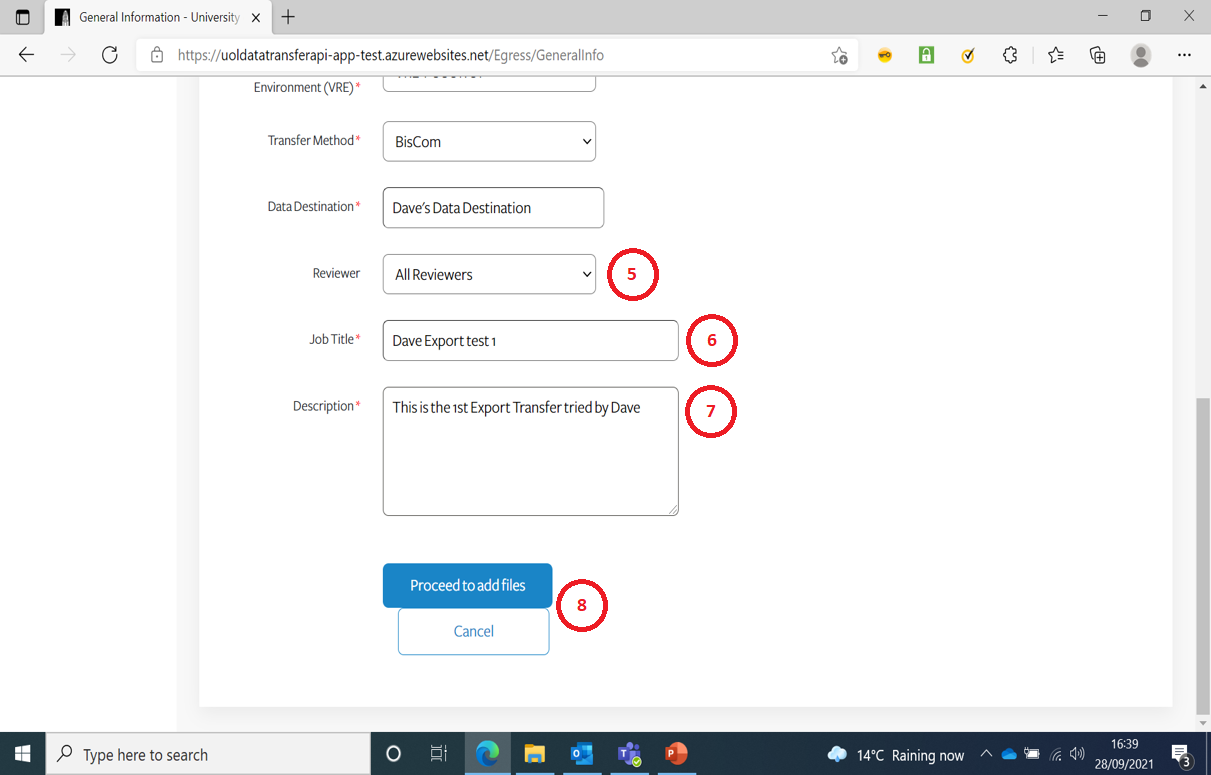
| 5 | Version 1 of the App will default to All Reviewers |
| 6 | Enter a meaningful short title for the Job |
| 7 | Enter a meaningful description for the Job |
| 8 | Either Proceed or Cancel (to go back to previous page) |
Select Files To Upload
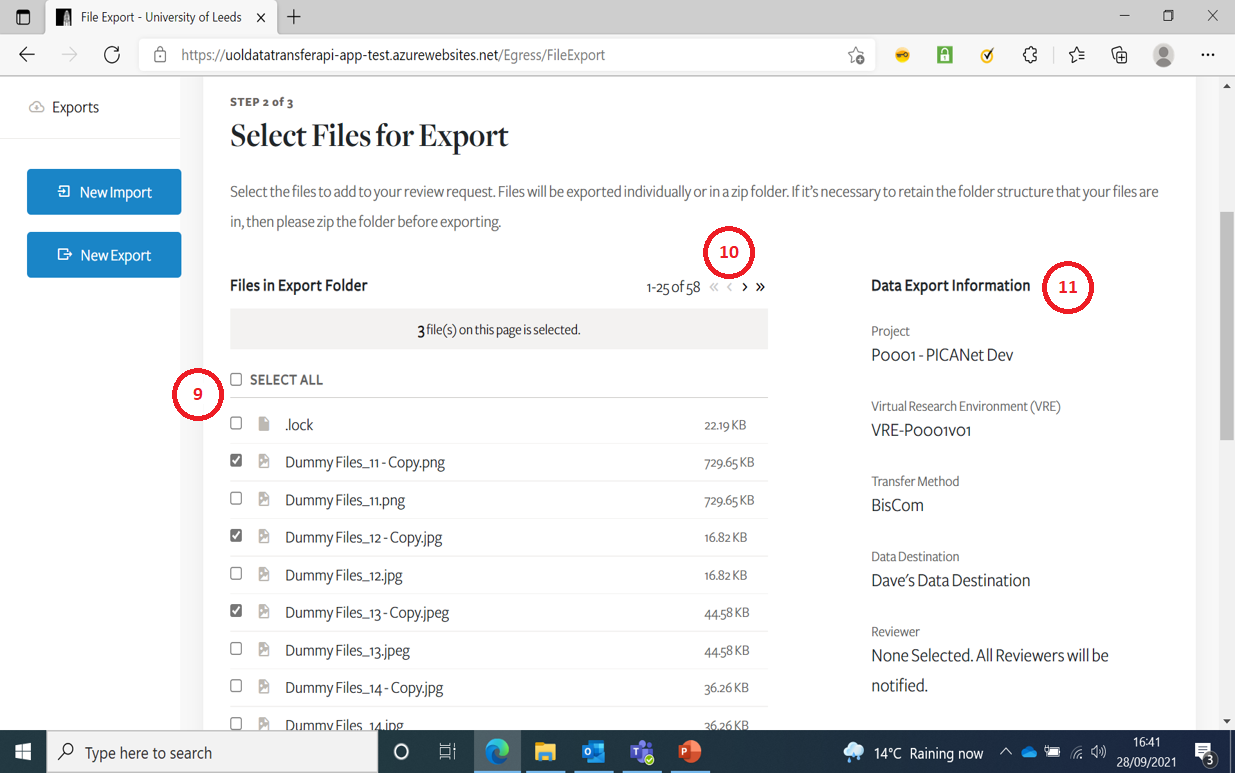
All files present in the root of /Export file share of the VRE will be available to select.
Any files types can be uploaded except empty files.
Folders cannot be uploaded.
There is no max file/job size limit - the system has been tested to upload 30GB.

| Item | Description |
|---|---|
| 9 | You can select one or more files for further action |
| 10 | Max 25 files are listed per page, but you can scroll or fast forward/backward to other pages of files |
| 11 | This pane summarises details of the Job |
Press ‘Add files for export’ once you are happy with your selections (You will receive one more confirmation prompt after this).
See Export Job in Dashboard Screen
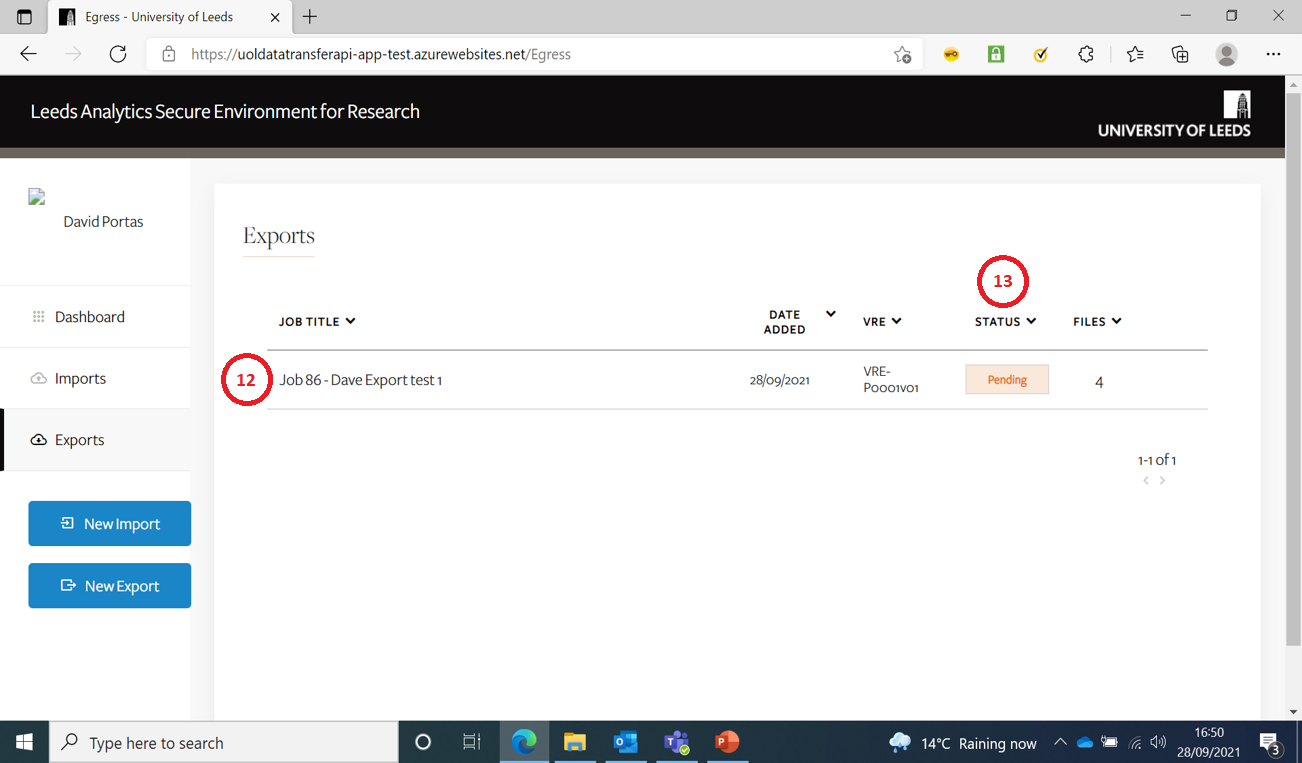
If you go back to the Dashboard screen your Export Job(s) should be listed.

| Item | Description |
|---|---|
| 12 | Your Export Jobs should be listed in order of Date Added (Created) |
| 13 | The Status column lets you know if your Job is ‘Pending’ review, or has been reviewed and been ‘Approved’ or ‘Rejected’ |